Background
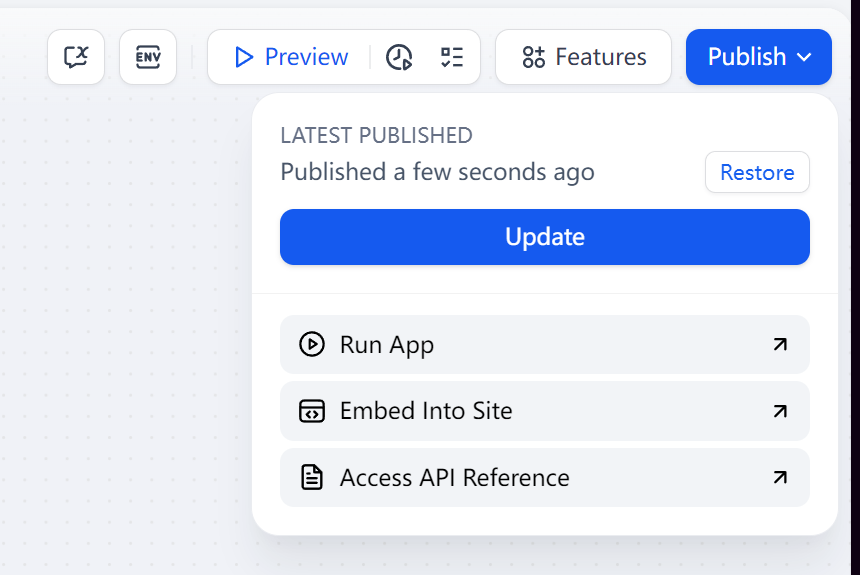
If you are a Dify user you might be suffering from the lack of user control from default chat application page. You have three options when deploying Dify workflow, but none of them supports user control (i.e. login and logout, etc.) and you cannot track the username either.

What you will go through
In this blog, we are going to build a Gradio App as our beginning, which will consume Dify API as inference service. Gradio is a framework that let you use Python to create Web Application, with direct support of GenAI.
Gradio 101
Install and Setup
You can use following setup to run your Gradio:
Use python installed and install it via
pip:pip install --upgrade gradioUse Gradio Lite
I personally recommend using pyenv and poetry to manage your Python and Gradio. The minimal setup is to use venv.
Once you get your Gradio installed, create first gradio file greet_interface.py and use py greet_interface.py to run it.
import gradio as gr

def greet(name, intensity):
    return "Hello, " + name + "!" * int(intensity)

demo = gr.Interface(
    fn=greet,
    inputs=["text", "slider"],
    outputs=["text"],
)

demo.launch()
#or demo.launch(share=False, server_name="0.0.0.0", server_port=7860)
Auto-Reloading
In last section, we use py to run the python codes which will conduct demo.launch() once. However, to use auto reloading, use following command:
gradio greet_interface.py
*Notes: the directive gradio must be in your path. Make sure you:
- Use
pipand installed gradio globally in your machine, OR: - Use
venvand conductpip installin your venv, OR: - Use
poetry shelland conductpoetry addin your poetry venv.
Auto-Reloading Explained:
When using
gradio, thedemo.launch()will not be called. Instead, Gradio specifically looks for a Gradio Blocks/Interface demo calleddemoin your code. https://www.gradio.app/guides/developing-faster-with-reload-mode
Simple Gradio Chatbot Application
Gradio can be used to build Chatbot or connect to other GenAI services in a fast and simple way:
from openai import OpenAI
import gradio as gr
api_key = "sk-..."  # Replace with your key
client = OpenAI(api_key=api_key)
def predict(message, history):
    history_openai_format = []
    for msg in history:
        history_openai_format.append(msg)
    history_openai_format.append(message)
    response = client.chat.completions.create(model='gpt-3.5-turbo',
    messages= history_openai_format,
    temperature=1.0,
    stream=True)
    partial_message = ""
    for chunk in response:
        if chunk.choices[0].delta.content is not None:
              partial_message = partial_message + chunk.choices[0].delta.content
              yield partial_message
gr.ChatInterface(predict, type="messages").launch()
[Electives] Use Dify API:
I have a dify_api.py ready to be saved in lib folder:
import os
import requests
from dotenv import load_dotenv
load_dotenv()
class WorkflowRequest:
    def to_dict(self) -> dict:
        raise NotImplementedError("to_dict methods must be implemented")

def dify_workflow_request(workflow_request:WorkflowRequest,user:str,api_key_name:str)->dict:
    api_key = os.getenv(api_key_name)
    url = os.getenv('DIFY_URL')
    headers = {
        'Authorization': 'Bearer '+api_key,
        'Content-Type': 'application/json'
    }
    data = {
        "inputs": workflow_request.to_dict(),
        "user": user,
    }
    print('[API]Call Dify api with',api_key_name,url,headers,data)
    response = requests.post(url, headers=headers, json=data)
    if response.status_code == 200:
        print('[API]Dify API 200 ok')
        return response
    else:
        print('[API]Dify API ',response.status_code)
        return response

def dify_chat_request(query:str,user:str)->str:
    API_KEY = os.getenv('API_KEY')
    URL = os.getenv('DIFY_URL')
    headers = {
        'Authorization': 'Bearer '+api_key,
        'Content-Type': 'application/json'
    }
    if conversation_id:
        data = {
            "inputs": {},
            "query": query,
            "conversation_id": conversation_id,
            "user": user,
        }
    else:
        data = {
            "inputs": {},
            "query": query,
            "user": user,
        }
    response = requests.post(url, headers=headers, json=data)
    if response.status_code == 200:
        conversation_id = response.json()['conversation_id']
        print('[API]Dify API 200 ok')
        return response.json()['answer']
    else:
        return response
For example, to use workflow API, first create your custom Workflow request class, and call dify_workflow_request:
class You_Custom_WorkflowRequest(WorkflowRequest):
    def __init__(self, query: str, before: str, after: str, file_type: str, requirements: str):
        self.query = query
        self.before = before
        self.after = after
        self.file_type = file_type
        self.requirements = requirements
    def to_dict(self) -> dict:
        return {
            "query": self.query,
            "before": self.before,
            "after": self.after,
            "type": self.file_type,
            "requirements": self.requirements
        }
 workflow_request = You_Custom_WorkflowRequest(...Some Parameters)
 dify_workflow_request(workflow_request,api_user,api_key_name='WORD_SUPERVISOR_API_KEY')
Gradio 201 - In your FastAPI Services
Why use FastAPI
As we mentioned, the best way to build Gradio App is to create a py file and create a demo from gr.Interface. We can use FastAPI to compose multiple Gradio App page and add true backend API like /login.
The first thing you need to do is to re-arrange your working files, I use following design:
D:.{your project root folder}
│   .dockerignore
│   .gitignore
│   dockerfile
│   poetry.lock
│   pyproject.toml
│   Readme.md
│   requirements.txt
└───app
    │   .env
    │   .env-example
    │   main.py
    │   __init__.py
    ├───lib
    │   └───__init__.py
    ├───interfaces
    │   │   app1_interface.py
    │   │   app2_interface.py
    │   └───__init__.py
Key takeaways:
- Use an
Appfolder for all your python codes. The root folder is used for config/readme - All gradio apps are in
interfacespackage, one interface python file is one gradio application. - Create a
libpackage for shared codes.
Now in the interfaces/__init__.py:
from .app1_interface import app1_interface
from .app2_interface import app2_interface
In the main.py , we need to install fastapi and use it to wrap up and manage gradio apps:
from fastapi import FastAPI, Depends, Request
import uvicorn
from app.interfaces import app1_interface,app2_interface
app = FastAPI()
Then, create Gradio object and mount it into FastAPI :
demo1 = app1_interface()
gr.mount_gradio_app(app, demo1, path="/demo1")
demo1 = app2_interface()
gr.mount_gradio_app(app, demo2, path="/demo2")
uvicorn.run(app, host="0.0.0.0",reload=False)
Now you can switch your Gradio apps in one website by different paths.
Gradio 301 - Get Authenticated
We need to add login authentication for our 0.0.0.0/demo1 or example.com/demo1. To do this , we can use Auth0.
First, create Auth0 tenent, application and setup, make sure you have following credentials set in your .env file, it looks like this:
AUTH0_DOMAIN = dev-1zs4dhguxbyxxxxxxx.us.auth0.com
AUTH0_CLIENT_ID=LNpnYxxxxxxxxxxxxxxxxxxxxxx
AUTH0_CLIENT_SECRET=yp6xxxxxxxxxxxxxxxxxxxxxxxxxxxxxxxxxxxxxxxxxxxxxx
then, modify our main.py
import os
from dotenv import load_dotenv
from urllib.parse import quote_plus, urlencode
from starlette.config import Config
from starlette.responses import RedirectResponse
from starlette.middleware.sessions import SessionMiddleware
from authlib.integrations.starlette_client import OAuth, OAuthError
app = FastAPI()
load_dotenv()
API_KEY = os.getenv('API_KEY')
URL = os.getenv('URL')
AUTH0_CLIENT_ID=os.getenv('AUTH0_CLIENT_ID')
AUTH0_CLIENT_SECRET=os.getenv('AUTH0_CLIENT_SECRET')
config_data = {'AUTH0_CLIENT_ID': AUTH0_CLIENT_ID, 'AUTH0_CLIENT_SECRET': AUTH0_CLIENT_SECRET}
starlette_config = Config(environ=config_data)
oauth = OAuth(starlette_config)
oauth.register(
    "auth0",
    client_id=os.getenv("AUTH0_CLIENT_ID"),
    client_secret=os.getenv("AUTH0_CLIENT_SECRET"),
    client_kwargs={
        "scope": "openid profile email",
    },
server_metadata_url=f'https://{os.getenv("AUTH0_DOMAIN")}/.well-known/openid-configuration',
)
SECRET_KEY = os.environ.get('SECRET_KEY') or "a_very_secret_key"
app.add_middleware(SessionMiddleware, secret_key=SECRET_KEY)
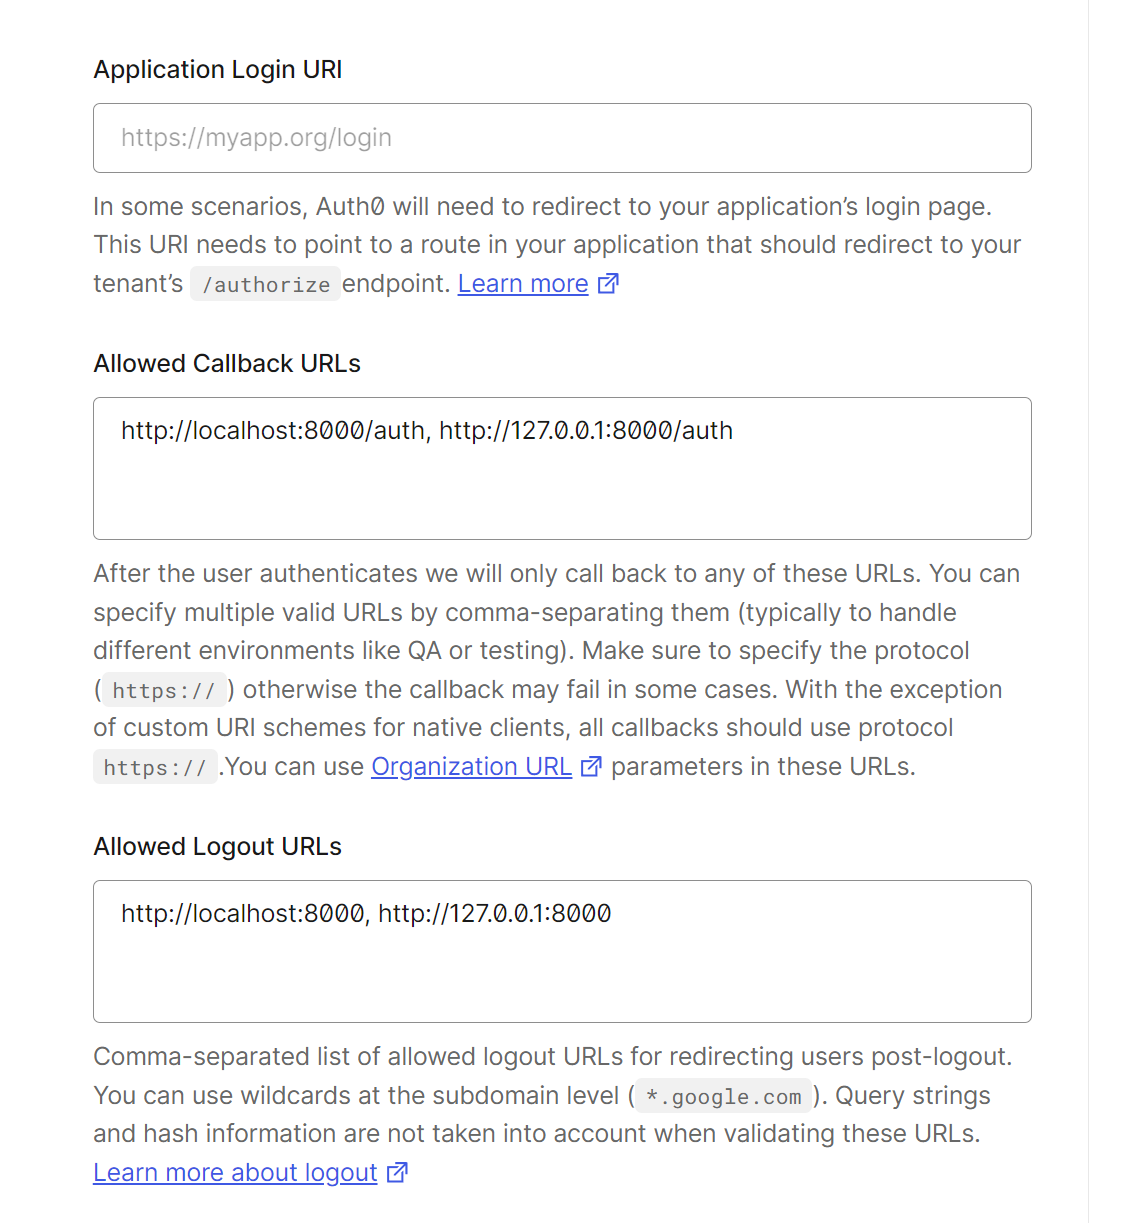
And you need to go back to Auth0 application settings, we need to add callback urls and logout urls to run Auth0 successfully.
For example, if you run your FastAPI locally in port 8000, your whitelist should be:

Once the Auth0 is well configured, the next thing we need to do is to create a login page, which can be also a gradio app:
Notice: login page can be served in
/login-page, and login API can be/login, they are different thing. One provides user a webpage, another one trigger a API operation.
import gradio as gr
#static page
def login_interface():
	with gr.Block() as demo:
        with gr.Column():
            gr.Markdown("Please login", elem_classes="text-center")
            gr.Button("Login with Auth0",
                        link="/login",
                        size="lg",
                        variant="primary",
                        elem_classes="btn-block")
    return demo
Now, implement all necessary APIs in main.py:
def get_user(request: Request):
    user = request.session.get('user')
    if user:
        return user['name']
    return None
@app.get('/')
def public(user: dict = Depends(get_user)):
    if user:
        return RedirectResponse(url='/demo1')
    else:
        return RedirectResponse(url='/login-page')
@app.route('/login')
async def login(request: Request):
    redirect_uri = request.url_for('auth')
    # If your app is running on https, you should ensure that the
    # `redirect_uri` is https, e.g. uncomment the following lines:
    #
    # from urllib.parse import urlparse, urlunparse
    # redirect_uri = urlunparse(urlparse(str(redirect_uri))._replace(scheme='https'))
    return await oauth.auth0.authorize_redirect(request, redirect_uri)
@app.route('/logout')
async def logout(request: Request):
    request.session.pop('user', None)
    return RedirectResponse(url =
        "https://"
        + os.getenv("AUTH0_DOMAIN")
        + "/v2/logout?"
        + urlencode(
            {
                "returnTo": request.url_for('public'),
                "client_id": os.getenv("AUTH0_CLIENT_ID"),
            },
            quote_via=quote_plus,
        )
    )
@app.route('/auth')#callback func
async def auth(request: Request):
    try:
        access_token = await oauth.auth0.authorize_access_token(request)
    except OAuthError:
        return RedirectResponse(url='/')
    request.session['user'] = dict(access_token)["userinfo"]
    return RedirectResponse(url='/')

login_demo = login_interface()
gr.mount_gradio_app(app, login_demo, path="/login-page")
And then you are good to go!
You can get user's info in any of your gradio page, like demo1, for example:
def greet(request: gr.Request):
    return f"Hi, {request.username}"

...
        with gr.Row(equal_height=True):
            with gr.Column(scale=4):
                m = gr.Markdown("", elem_id="welcome-message")
                demo.load(greet, None, m)
                    with gr.Column(scale=1, min_width=100):
        with gr.Row():
            gr.Button("Demo2", link="/demo2", variant="secondary", size="sm")
            gr.Button("Logout", link="/logout", variant="primary", size="sm")
...